Of all the issues we encounter from customer supplied files, easily the most common is related to bleed.
Bleed is required if you have any image, be it type, a graphic or a solid, running to the edge of the page.
If you are designing a piece and want image to run to the edge of the sheet you must design it to run 1/16″ past the edge of the sheet. This compensates for any back and forth movement of the item, either in printing or trimming (technically called registration, or in this case I suppose mis-registration). Failing to add this will leave you with a possible white area at the edge of the card.
The extra 1/16″ must be added with the expectation of it being cut off. Therefore, do not move the type out. There should be an additional 1/8″ between the type and the edge of the finished card.
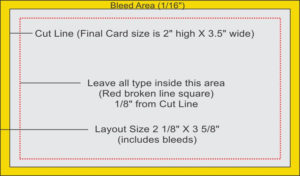
The following graphic of a business card shows what I mean.

The card will be 2″ x 3.5″ when completed. The yellow area is the bleed area (outside of the finished size) and the red broken line is the ‘safe’ zone, outside of which no type should be set.
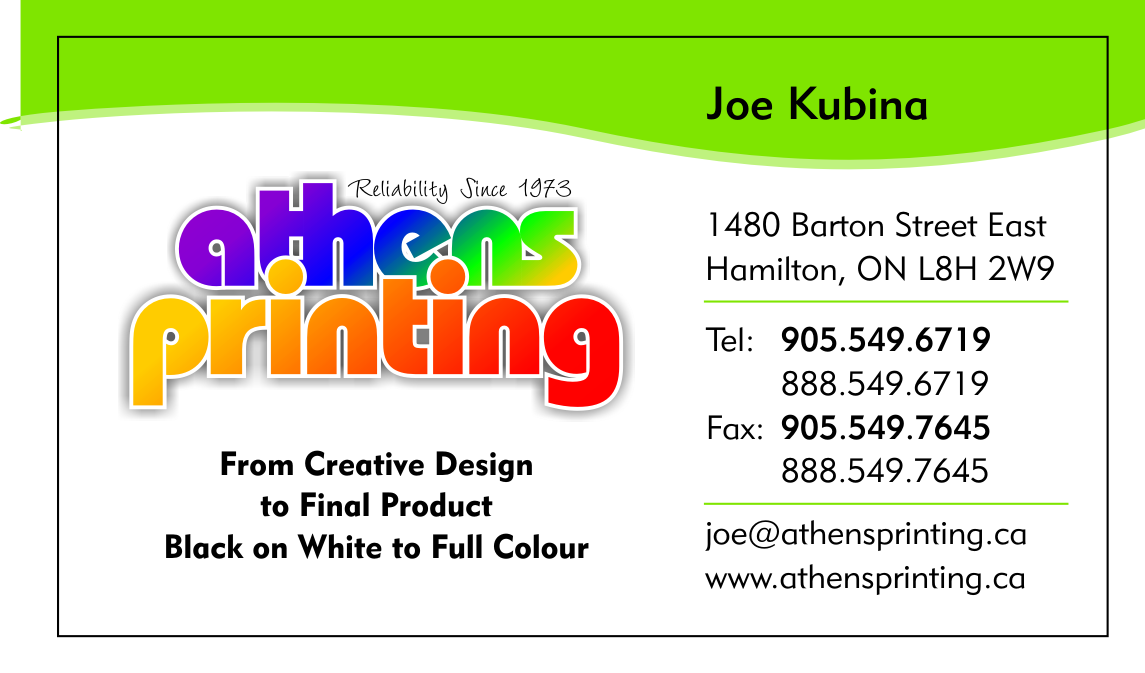
The card in the header illustrates this in real life. You can see that the green along the top of the card extends past the black line, which represents the outside of the finished card after the final trim.
Some programs that are not ‘graphics’ programs, allow you to create business cards but don’t have a way to include a bleed. A ‘trick’ you can use would be to set the type in a bit extra from the ‘safe zone’ and we can slightly enlarge the file at printing. This will simulate a bleed and won’t move the type too close to the edge.
It’s a bit difficult to get your head around at first, but quite simple once you do.
Remember this and your next project will look that much more professional.
You can read more about bleed as well as other file preparation hints in our Order Guide.


